 |
 |
Create Dramatic Black and White Images
with iCorrect® EditLab Pro
Plug-in
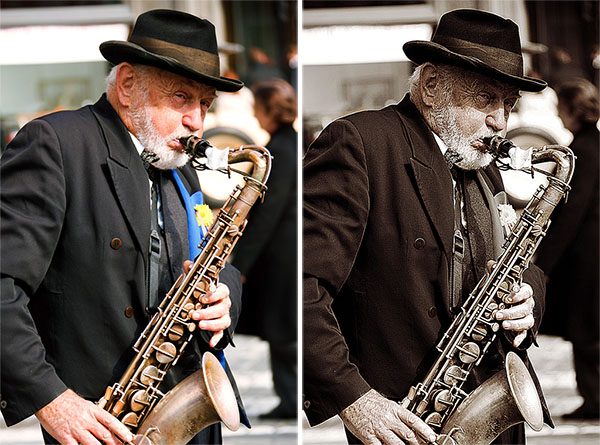
More and more digital cameras now include
modes and features that produce all types of effects that in the past
could have been done only on the computer. Among these is the
ability to shoot in different types of filters including black and white
and sepia tone.
So, the question of the day is:
"Should I shoot in black and white or convert later on the computer?"
The general consensus among most digital photo experts seems to be:
"Shoot in full color and convert on the computer".
The main reason for this is that when you shoot in these modes, you are
making all of your creative decisions when you take the shot. In most
cases this means you are limiting your options down the road when
compared to starting with a full colored shot.
That said, many software programs have a standard black and white conversion
feature which works well enough in certain cases. But a lot of times,
we're trying to achieve a certain look or create a more dramatic
expression. In these instances, it's better to use a specialized
application that offers additional creative tools. One of the best
programs for this is PictoColor Software's
iCorrect EditLab Pro, a
robust color correction and enhancement plug-in for Adobe Photoshop,
Photoshop Elements, and Corel PaintShop Pro.
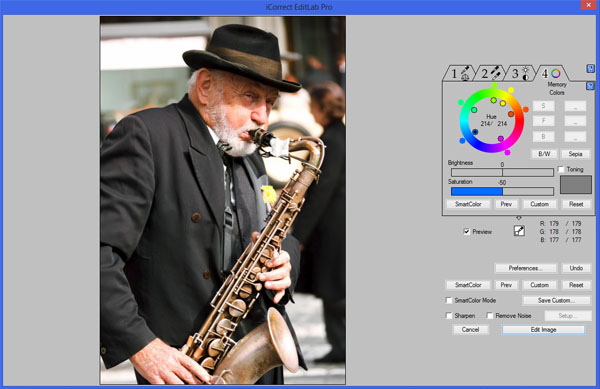
In addition to simply reducing the Saturation globally to -100 to
convert to black and white, iCorrect EditLab Pro offers specialized
tools that make it easy to create more dramatic effects. After
doing a basic black and white conversion to see whether a
particular photo is a good candidate for conversion, you will want to
switch to the fourth adjustment tab of the control panel identified by
the hue wheel. This is where the HueSelect Control Point
Technology is utilized.
|

Notice that when you first open the HueSelect
controls each of the control points are uniformly positioned around the
hue wheel. The first step in making hue-selective changes is to
click the SmartColor button within the HueSelect window of the control
panel. This will automatically set the control points of each of
the hue handles to the most prominent colors in the photo.
|
Then, for each of the six hue handles, select
the control point (on the inside of the hue ring) and reduce its
Saturation to -50. Finally, visit each hue handle and adjust its
Brightness to the desired level. You will see that as you change the
Brightness for a particular hue handle, the gray shade for only that
particular color changes in the image. This allows you to provide better
discrimination among the tones in the final black and white conversion.
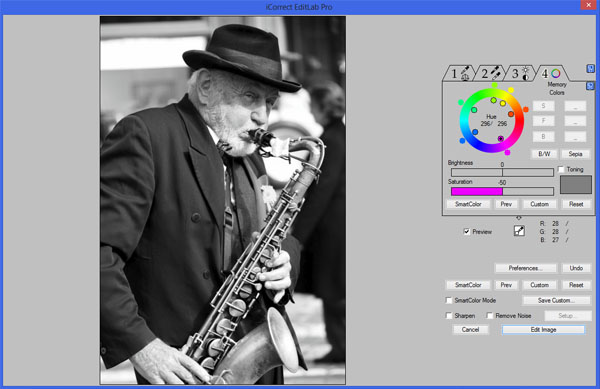
In this case, we begin with the blue hue of the man's tie, and
work our way around clockwise until finishing with the magenta control point.
|
| |
One of the most
unique and useful capabilities of iCorrect EditLab Pro's HueSelect
Control Point Technology is the way it allows you to selectively adjust
colors and light with great precision without the need for complex masks
or other cumbersome, less accurate selection tools.
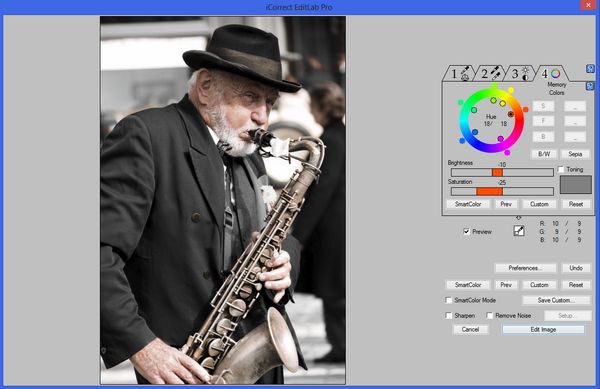
This is particularly useful for bringing back and
adjusting the strength and brightness of the specific colors in an image on a very
precise, hue-selective basis. In this instance, the HueSelect
Control Point in the upper left of the hue wheel that was positioned
automatically with the SmartColor button corresponds directly to the
skin tones. In doing this, the man's face and, to a lesser degree,
the saxophone, will be a bit more prominent after we apply the sepia
tone globally at a reduced opacity.
|
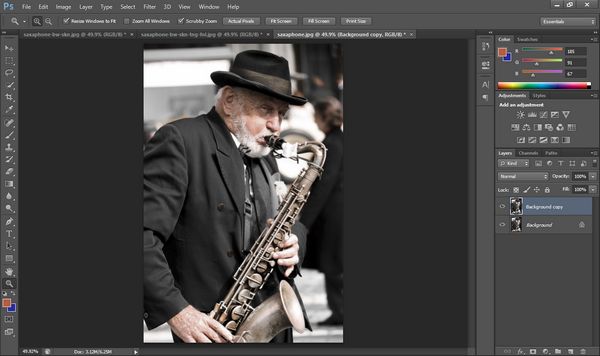
Since we want to add a soft sepia tone, but
still retain a mostly black and white look, let's go ahead and creat a
second Photoshop layer of the original photo to which we can apply the
sepia tone and then introduce it to the final image at roughly 50%
opacity.
|
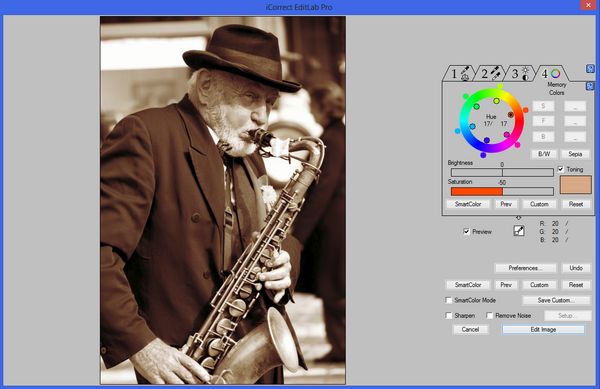
Toning controls are also found in the
HueSelect Control tab of iCorrect EditLab Pro. It provides a
preset Sepia Tone, but also allows for user-defined Toning as well.
In this case we used the Color Picker to create a custom tone color
based on the man's skin tone.
|
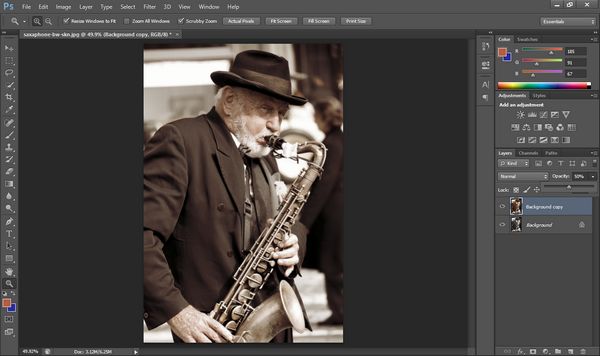
Pasting the Toning layer at 50% opacity gives
the image that soft, subtle look of a duo tone while preserving the
richness of the initial black and white conversion.
|
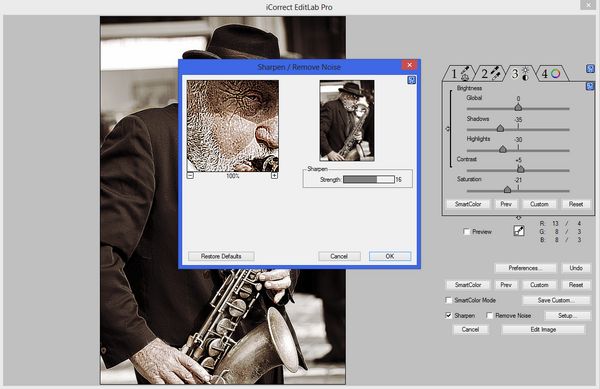
Next, we may to accentuate some of the fine
details and add some texture with the Sharpening tool. Also, by
slightly exaggerating the Sharpening, we can also introduce some grain
and give the image a more distressed, rugged look.
|
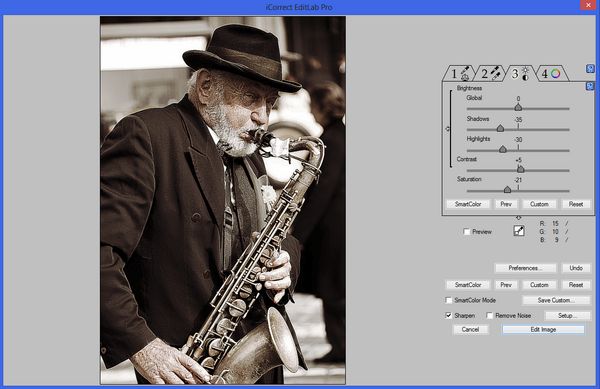
Finally, we may want to step back for a final
look to see if anything needs further refinement or adjustment.
Here, we may want to deepen the shadows or tweak the overall strength of
the saturation to give the final image an even richer, yet softer look.
This is just one example of how
iCorrect EditLab Pro can be used to
create more dramatic images with greater impact so you can express and
showcase your creative vision more easily.
|
Click for larger image
|
|
|
|
|
 |

